Sunday, October 20, 2013

Art walk

Last Sunday I went to an Art Walk and Beer Garden event in downtown LA: 


Present's:


This Thursday I went out with some old co-workers. I opted to go for texture overload and wore my new Wildfox sweater and my faux leather leggings from VS Pink. Here's a close up... 


Leather and sequins and wool OH MY!

 And here's a full frontal view:


Top: Wildfox Brigitte's Heart Lake House T, available here
Bottoms: Victoria's Secret Pink Faux Leather Panel Legging, available here

The Sweater was originally seen in the Wildfox "Hello, Sailor!" look book:


So adorable!

Also... I love that I'm getting more halloween cards than birthday cards. My friends and family know me so well.

Ciao Ciao,
Kk


Crafty Sunday: pumpkins and crayons

So I normally do a Nightmare Before Christmas themed pumpkin, and I probably still will, but this idea came to me a month ago and I just couldn't pass it up. I keep seeing Crayon art posts on pintrest, and while the rainbows look really pretty, everyone else seems to have done them. So I tried brainstorming ideas of how to use the same technique, but ... not do a rainbow. 

So let me present to you... 

Pumpkin nĂºmero uno: Eeyore ❤️

Step number 1: Draw the image you want on paper first. No matter what. A lot of people start sketching on the pumpkin, but then eventually you start to carve and the entire face falls in because you didn't take the time to think it through. 


Step two: Cut open your pumpkin and clean out all of the gunk! This is my favorite part =) Save those pumpkin seeds and bake them later!! 

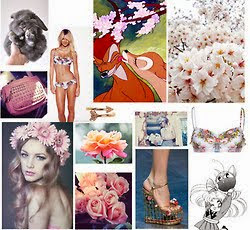
Here is my inspiration: 


Step 3: Take fabric pins to pin the drawing onto your pumpkin. You want to make sure that the paper is going to stay in place beacuaseeee you will then be... 

Step 4: ...taking a thicker pin and poking holes into your drawing. I used a furniture tack because of it's thickness, but a push pin or wall tack will work just as well. BEFORE you start pinning, think about what lines your going to carve. Remember, if you carve all of the lines you drew, your character is just going to fall out and you'll be left with just an outline. Use the pin to only push holes into the lines that you are actually going to carve. I choose to cut out certain parts completely (his hair, eyes, and nostrils) and then just specific outlines for the rest... 

This is what it looks like after you pin it. Notice how the feet outlines are not connected to the rest of the body? 

You can even use a knife to just shave the rhine off of some parts. For example, I shaved the rhine off his nose and eye lids to define them without cutting all the way through. 

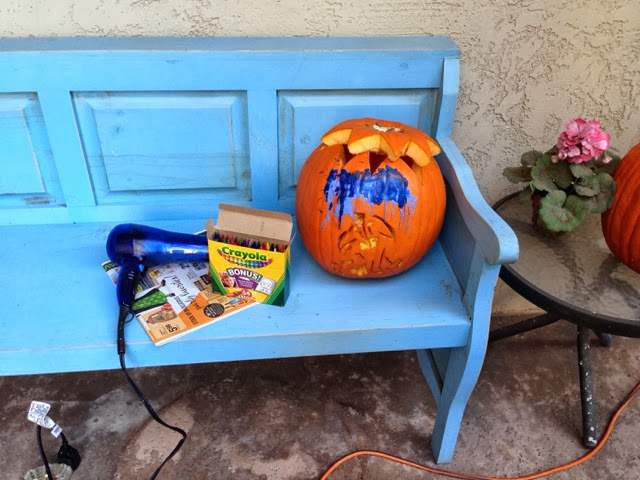
Now Step 5: Grab some crayons and a hair dryer! For the rain cloud, I want to use differn't color blues to give it more dimension. You can either glue the crayons onto the pumpkin (thank you pintrest) OR hold the crayons to have more control (what I did). I didn't want one color blue to be in one spot but not the rest... so I just moved the crayon around as I blasted it with the hair dryer. 

After some trial and error, I found that holding the crayon vertically and hitting it with the hot air at the middle of the crayon works best. This way, the wax you heat up in the middle melts down giving you a "rain" effect. If you try hitting the tip of the crayon only with the hot air, the wax splatters EVERYWHERE, and does not give you the rain effect as well.   


I have a few more layers to do... and will take pictures with a candle in it later... but for now, here is Eeyore! 


Thursday, October 17, 2013

October catch up


Ahhh I just realized I haven't done much blogging lately. Sorry loves...

          
Please don't put a hex on me...

So two weekends ago I went to sf for a race and to celebrate my girl Clare's birthday! We went out in downtown wallnut creek and had a blast. The next day I got to see the kids I used to nanny for a bit... They gave me the most adorable memory books and pictures:
                     

Lots of wolves, bats and hammerhead sharks! They remembered my favorite animals ❤️❤️

After that I loaded up on pasta and got ready to race! 
Both of my parents and I ran in the bridge to bridge race in sf. It starts under the clocktower... And is supposed to end by the golden gate but because of the govenment shut down we eneded in Chrissy fields instead.
Ready to run!
I ran 12 min faster over all that last year, booya!

Spencer, who went to the blue grass festival, came down to pick us up and we all went to The Ramp. It's our go to after races in sf.

Our table was right on the water :)
Here are some weird triply monkeys by our car and a strung out ... Sloth? Anteater in a tree?

We drove back to la after the race on Sunday so we could go to work and the KINGS HOME GAME on Monday!! I actually got tickets with my friend Lauren and spencer went with his friend. We all went to watch the opening from the disc suite first:
Before heading down to the fifth row❤️❤️


I love hockey sooo much!!
For my outfit I wore: 
My la kings jersey top (Quick, I also have a Dustin brown one).
My Wildfox black and white bow sweater. (Similar one here)
And my new Kings hat compliments of their marketing staff:


Ok so now were caught up to last Monday... Phew 

I'll put up pictures from the art show I went to last weekend and some outfits shots tomorrow. I have a long night of work ahead of me ❤️

Ciao ciao
Kk


Friday, October 11, 2013

Crafty Thursday

So I've been looking for a craft to do lately and last week one jumped out and grabbed me! Bleach shirts! 

Here's the how to:

Step 1: find inspiration. Mine comes from a recent dollskill post on instagram:

Step two: assume your shirt won't look as cool but get excited to be crafty anyways...

No just kidding, step two is grab materials!

You need a tshirt or tank top, a Clorox bleach pen (for whites only!), wax paper and an old magazine. 

Tip: the color of the shirt changes the results. Dark fabrics turn orange with bleach and light ones will turn white. Plan accordingly.

Step three: put wax paper over the old magazine and slide it inside the shirt. This will keep the bleach from soaking through. Make sure the wax side is facing up!! 

Step four: draw or write onto the shirt using the Clorox bleach pen. Be careful, if the bleach touches other areas of the shirt it will... Bleach it.... 

Steady those hands!


Step five: wait 15 min. I waited ten starting from the time I finished the past word. But it will end up even regardless because you wash it off top to bottom as well. After waiting 15 min...

Step six: wash it off. Now remember, it will bleach the rest of the shirt if your not careful!! Carefully remove the magazine and wax paper. Then put the first words under a steady stream of water. Make sure all of the bleach residue is washed off before going on to the next word. Continue until they have all been washed off. 


Tip: for long sayings like the one I did, just move the magazine down under the lower words so the bleach doesn't bleed through the shirt as you wash off the first words.

Step seven: take hand soap and massage it onto the words. Wash off. Then take laundry detergent and hand or machine wash. 

Step eight: if you hand washed your shirt, find a place to dry your shirt. Creativity counts! (Just kidding, if you don't have to pay for your dryer, toss that bad boy in there).

If you want the text to be white, pick a brighter color fabric like below: 


Next week I'll be making a new craft! Maybe cat ear headbands... If you want to save time nordstroms has them already made ;) enjoy your tshirt! 

Xoxo 
Kk