So I normally do a Nightmare Before Christmas themed pumpkin, and I probably still will, but this idea came to me a month ago and I just couldn't pass it up. I keep seeing Crayon art posts on pintrest, and while the rainbows look really pretty, everyone else seems to have done them. So I tried brainstorming ideas of how to use the same technique, but ... not do a rainbow.
So let me present to you...
Pumpkin número uno: Eeyore ❤️
Step number 1: Draw the image you want on paper first. No matter what. A lot of people start sketching on the pumpkin, but then eventually you start to carve and the entire face falls in because you didn't take the time to think it through.
Step two: Cut open your pumpkin and clean out all of the gunk! This is my favorite part =) Save those pumpkin seeds and bake them later!!
Here is my inspiration:
Step 3: Take fabric pins to pin the drawing onto your pumpkin. You want to make sure that the paper is going to stay in place beacuaseeee you will then be...
Step 4: ...taking a thicker pin and poking holes into your drawing. I used a furniture tack because of it's thickness, but a push pin or wall tack will work just as well. BEFORE you start pinning, think about what lines your going to carve. Remember, if you carve all of the lines you drew, your character is just going to fall out and you'll be left with just an outline. Use the pin to only push holes into the lines that you are actually going to carve. I choose to cut out certain parts completely (his hair, eyes, and nostrils) and then just specific outlines for the rest...
This is what it looks like after you pin it. Notice how the feet outlines are not connected to the rest of the body?
You can even use a knife to just shave the rhine off of some parts. For example, I shaved the rhine off his nose and eye lids to define them without cutting all the way through.
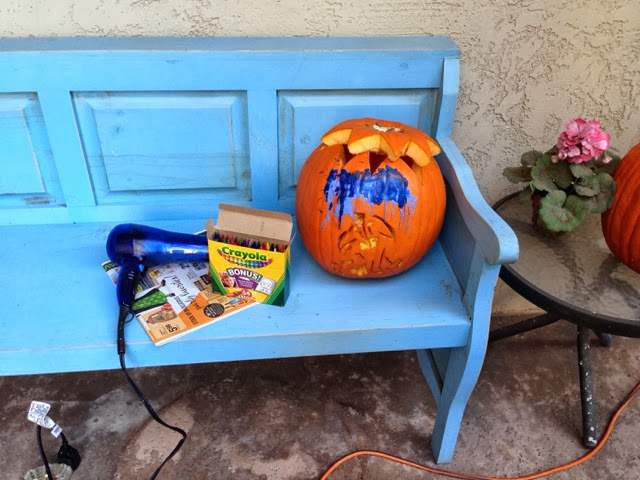
Now Step 5: Grab some crayons and a hair dryer! For the rain cloud, I want to use differn't color blues to give it more dimension. You can either glue the crayons onto the pumpkin (thank you pintrest) OR hold the crayons to have more control (what I did). I didn't want one color blue to be in one spot but not the rest... so I just moved the crayon around as I blasted it with the hair dryer.
After some trial and error, I found that holding the crayon vertically and hitting it with the hot air at the middle of the crayon works best. This way, the wax you heat up in the middle melts down giving you a "rain" effect. If you try hitting the tip of the crayon only with the hot air, the wax splatters EVERYWHERE, and does not give you the rain effect as well.
I have a few more layers to do... and will take pictures with a candle in it later... but for now, here is Eeyore!


No comments:
Post a Comment